• Skip to primary navigation
  • Skip to main content
  • PRICE LISTS
    • PRICE LIST: NAILS
    • PRICE LIST: MAKE-UP
  • CONTACT
  • SHOP
  • TESTIMONIALS
  • FAQ
    • Nails FAQ
    • Make-up FAQ
  • T&Cs
    • Refund and Returns Policy
    • Terms & Conditions
  • Nav Social Menu

    • Facebook
    • Instagram
    • Pinterest
  • 1 item

Rambling Rose

  • Price Lists
    • Nails
    • Make-up
  • Shop
  • Blog
    • Articles
    • How to … & Tutorials
    • Make-up brushes & tools
    • Nails
    • Product Reviews
  • Contact
  • T&Cs
    • Refund and Returns Policy
    • Terms & Conditions
  • Press

How to remove gel polish or gel extensions

April 20, 2020 | Articles, How to ... & Tutorials | Leave a Comment

Nail Extensions floral

Can gel polish or gel extensions be removed at home?

Yes, they can, but I always recommend having gel polish or gel extensions removed by a professional. If, for some reason, you are unable to make an appointment to see me, or can’t get to a professional salon, then you can do it yourself using the steps below:

You will need:

  • a nail file
  • a buffing block (optional)
  • nail polish remover containing acetone (non-acetone formulas won’t work)
  • cotton wool, or cotton wool pads (cut the rounds into quarters)
  • foil wraps (squares of tinfoil approximately 5cm x 10cm)
  • a cuticle pusher, or orangewood cuticle stick
  • cuticle oil (or olive oil, hand cream will also work but not as well)

I do sell gel polish removal packs that contain a nail file and buffing block, cuticle stick, ten removal wraps containing acetone, and a small pot of hand lotion. If you’d like one of these packs, kindly ask at your next manicure appointment or purchase one from our online store. If you’ve already purchased a removal pack and still have the nail file, buffing block and wooden cuticle stick, I can sell you the removal wraps without you needing to purchase an entire removal kit.

To remove your gel polish or gel extensions:

1. Lightly file the entire surface of the gel polish with the nail file, so that the top coat loses its shine.
2. Apply cuticle oil to the skin around your nails, avoid getting it on your nails. The cuticle oil will prevent the nail polish remover from drying out your skin too much.  If you don’t have cuticle oil, apply a little olive oil or a thin layer of hand cream.
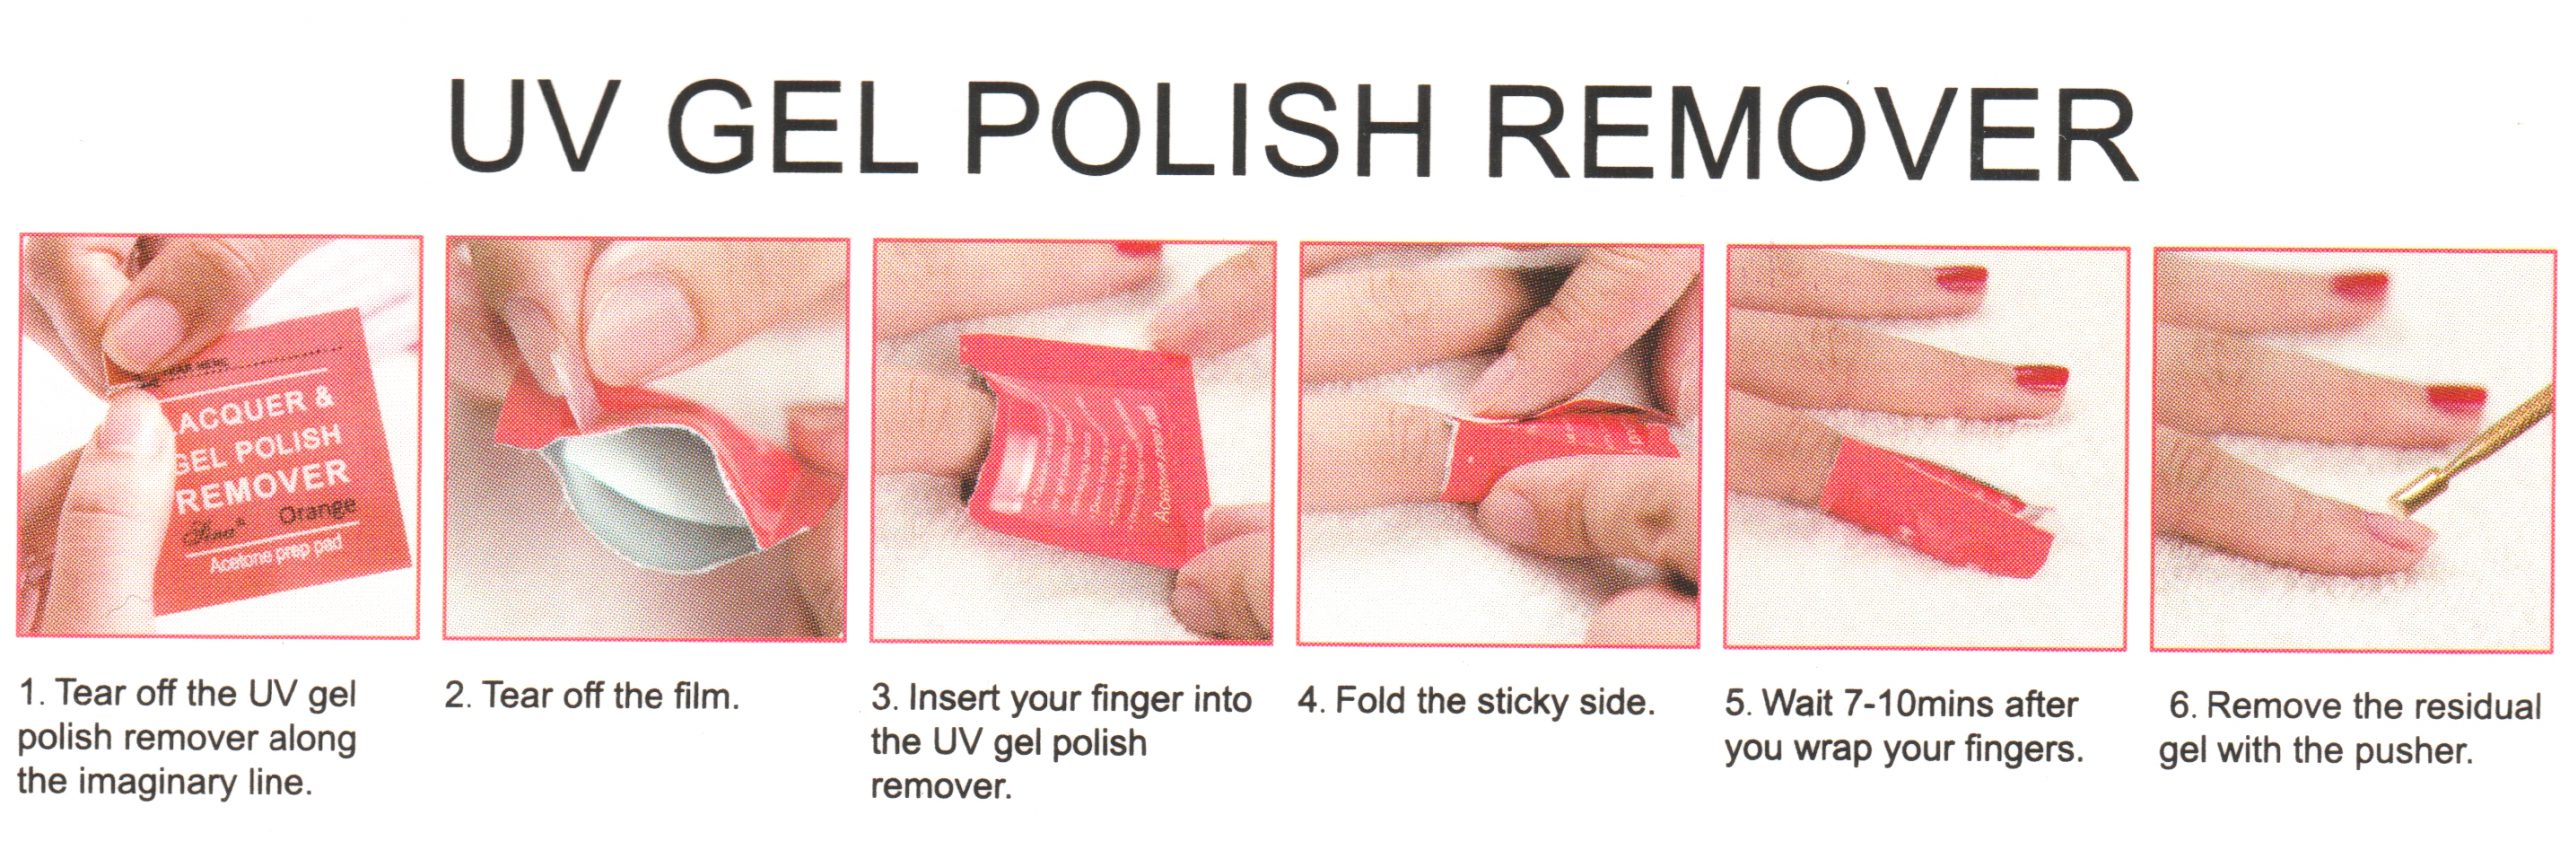
3. Moisten your cotton wool well with nail polish remover and place the cotton wool over the nail and wrap a square of foil securely around your finger, folding the excess on top over onto the top of your nail.  Squeeze the wrap in place so that it’s a snug fit. If using a removal kit, open the pre-moistened removal pad sachet according to the instructions on the pouch, and slip your finger into the pouch with the pad on sitting on top of your nail. Use the self adhesive strip to secure the pouch around your finger (see photos at the bottom of this post).

Foil removal wraps

4. Repeat step 3 and wrap all remaining nails.
5. Leave these foil caps on for 10 minutes to dissolve the gel polish bonds. If you’re soaking off gel extensions, wait 15 minutes.
6. If it’s cold, sit on your hands or place them under one of those microwavable heat packs or a wheaty bag, as warmth helps to loosen the polish and adhesive bonds.
7. Starting with the finger that you first applied nail polish remover to, carefully slide the foil cap or pouch off, being careful not to squash it.  Gently scrape off any soft and peeling gel polish using the cuticle stick. If the polish doesn’t come off easily, replace the foil cap that you’ve just removed and move onto the next finger. Don’t force any stubborn polish off, as you may damage your nail.
8. Repeat with remaining fingers, removing and replacing the foil caps as needed, until all the polish has been soaked off and gently removed. You may need to do step 7 multiple times if removing gel extensions.
9. (optional) Use the buffing block to remove any last traces of product, starting with side 2, then side 3. Finally, use side 4, to buff your nails to a nice shine. Finish by applying hand cream and massage it into the hands, cuticles and nails.

This method can also be used for gel polish on toes, but it can be rather fiddly.

If you absolutely cannot get to a salon for a professional to remove your acrylic enhancements, this same method can be used, although acrylic will need to be soaked for longer – around 20 minutes.  If the acrylic doesn’t gently flake off, replace the foil ‘cap’ and soak it for a little longer. Don’t force any acrylic off, as you will damage your natural nails by tearing off layers of the nail along with the product you’re trying to remove. This kind of damage can leave your nails paper-thin and soft, or if it’s really stuck, even tear off whole portions of the nail plate, doing permanent damage to your natural nail.  

Wherever possible, always get a professional to remove your gel polish, and acrylic or hard gel enhancements.

Please note that PolyGel and Hard Gel overlays and extensions are done with non-soak off products and cannot be removed using the method above for gel polish.  Polygel and Hard Gel overlays or enhancements should always be removed by a professional.

removal pouch instructions

Share this:

  • Facebook
  • Twitter
  • Pinterest
  • Print

Reader Interactions

Leave a Reply Cancel reply

You must be logged in to post a comment.

Got a holiday or special occasion coming up? Did Got a holiday or special occasion coming up? 
Did you know you can book your manicure or pedicure appointments up to three months in advance using the online booking system.

Sit in the comfort of your own home and plan when you'd like to have your mani or pedi done, book your appointments, sit back and relax. You'll receive automated reminders 48 hours (via email) and 24 hours (via text) before each appointment.

Book online now:  https://www.fresha.com/a/rambling-rose-nails-and-make-up-mangawhai-thelma-road-north-i1d1r1d4/booking?menu=true&dppub=true&employeeId=450913&pId=142955

 #nailsbyappointment #mangawhainailtech #mangawhainailsalon #ramblingrosenails #mangawhai
This step-by-step guide will show you how to groom This step-by-step guide will show you how to groom your brows at home.  Before you start, make sure the have the following on hand:  an eyebrow brush & eyelash comb (usually on the same brush); two eyeliner pencils (any colour); tweezers and small scissors.

Read the article:  https://www.ramblingrose.co.nz/how-to-groom-your-brows/

 #groomyourbrows #doityourself #browtips
Gel-On Xtensions with a French finish and Lilo & S Gel-On Xtensions with a French finish and Lilo & Stitch feature nails. 
($104 for this set). Removal of product from another salon costs extra.

If you'd like nail art with your mani or extensions, please book an appointment WITH nail art - I need the extra time allocated.

 #liloandstitch2025 #liloandstitchnails #liloandstitchfrenchies
Times are tough, we've all been feeling the pinch, Times are tough, we've all been feeling the pinch, but I still love my clients to have pretty nails. So, with immediate effect, the price on all nail art will revert to $2 per nail.  This means a saving for you of $10 per full set, or $1 per nail.

As always, feel free to bring a picture of what you'd like to your appointment and I'll see what I can do.  Just be sure to book a mani or pedi WITH nail art, so that I have sufficient time.  If you haven't already booked your next appointment at Rambling Rose, please do so online:  https://www.fresha.com/a/rambling-rose-nails-and-make-up-mangawhai-thelma-road-north-i1d1r1d4/booking?menu=true&dppub=true&employeeId=450913&pId=142955

 #nailsbyappointment #mangawhainailtech #ramblingrosenails #nailart
Winter nail art inspiration. If you've booked in Winter nail art inspiration.

If you've booked in for nail art, feel free to bring and inspiration picture with to your appointment.

 #pinterest #pinterestinspo #pinterestnails #pinterestphoto
What’s the best colour eyeshadow for green eyes? What’s the best colour eyeshadow for green eyes? 

As we all know, complementary colours (colours opposite each other on a colour wheel) create a strong contrast and enhance each other. 
Read the full article on the Rambling Rose blog:  https://www.ramblingrose.co.nz/eyeshadow-for-green-eyes/

 #makeupandgreeneyes #greeneyes #greeneyesandeyeshadow
'Fierce,' a plum-coloured purple creme that's perf 'Fierce,' a plum-coloured purple creme that's perfect for winter.

 #fierce #plumnails #plummanicure #purplenails
Reniu (by Pure Fiji) is the affordable coconut car Reniu (by Pure Fiji) is the affordable coconut care collection dedicated to skin bliss for everyone, every day. Bringing multitasking, ultra-hydrating pure virgin coconut oil to all skin needs, protecting it from damage, and creating skin health at every level.

Because Reniu believes in the beauty of high quality ingredients that nourish us all,
naturally, Reniu pioneered the use of pure virgin coconut oil in skincare with plant-forward, cold-press extraction that protects its healing and hydrating properties. 

Available in these infusions (scents):
- Bamboo Lychee (fresh, clean scent)
- Coconut (sweet / tropical)
- Frangipani (musky floral)
- Hibiscus (sweet floral)

Treat your skin to a tropical holiday with the Reniu Skincare Range, available from our online store www.ramblingrose.co.nz/shop - find it under the Body & Nail Products category.

 #reniu #reniuskincare #purefijinz #affordableskincarenz
Do you prefer darker nails in winter? #artistic Do you prefer darker nails in winter? 

 #artisticcolourglossfashionista #darkpurplenails #darkpurplemanicure
Do you struggle with your make-up because you wear Do you struggle with your make-up because you wear glasses? 
Wearing glasses can affect the way that your make-up looks as the size of the frames can attract attention, highlight certain areas, or create unwanted shadows.

Need a few tips on what to do and what not to do?  Read the full article on the Rambling Rose blog:  https://www.ramblingrose.co.nz/make-up-and-glasses/

 #makeuptips #makeupandglasses #applyingmakeup

Copyright © 2025 · Rambling Rose